Aaron Blaise Explains The Essentials Of Animal Drawing [Exclusive Video]
Hello Everyone! My name is Aaron Blaise and I’ve been an animator, wildlife artist and animation feature film director for the past 30 years. I’m also an art educator and run a website called CreatureArtTeacher.com. Over the years I worked on many films including Beauty & The Beast, Aladdin, The Lion King, and more. I also co-directed Brother Bear.
It might seem apparent from that list, but I am a HUGE animal lover. In fact, over my career I have become pretty well known as the “the animal guy.” If I’m not animating them you are very likely to find me illustrating and drawing animals. They really are one of my favorite subjects.
Understanding animal anatomy and motion makes me a better animator. Also, it makes me a better concept artist and creature designer. The more you understand the anatomy of real animals the better your imagined designs will be.
I get questions about animal drawing all the time. So, I thought it might be fun to give the readers of Cartoon Brew a few tips on my process and approach to drawing animals. I’ve created a video that runs about 28 minutes long for you to watch my process. I also wanted to elaborate on some of the points from the video in the article below. So here, in my opinion, are “The Essentials of Animal Drawing.”
DRAW FROM LIFE – (Use what you have access to)
With the advent of the internet there are a ton of great sites and online resources for finding a huge wealth of information about animals. You can find detailed, high-res images of everything about them. And with sites like Youtube you can even find recorded or live streaming video of them in action. But, as great as those tools are they do not replace the need to draw from observation.
I am a big believer in the concept of a “Visual Library.” That is the visual record and knowledge that you accumulate over your life that you can call upon when sketching and drawing. There is no better way to build your own visual library then by getting out into nature and observing real animals in a real environment. Over time it will make you a better, faster, and more well rounded artist.
If you can’t get out into the jungle to draw leopards or the savanna to draw elephants that’s ok. I would strongly encourage you to use what you DO have access to. Draw your dog or cat. Go to the zoo. Go to a park. Go to a nature preserve. Or as I did in the video above, take a trip to a local farm. If all else fails draw the bugs and critters in your own backyard. There is wildlife all around if you look for it. Again it will always make you a better artist to observe the real thing rather than to rely solely on digital reference and books.
DO YOUR RESEARCH BEFORE YOU GO OUT!
Just as with my “7 Steps to Great Character Design,” research is crucial! BEFORE you head out into nature I implore you to do some research of the animals you will be encountering. Use Google, Youtube, National Geographic, etc. and study up on the subject you are planning on drawing for the day.
As you do this you will discover one very important concept – We Are All Basically The Same!

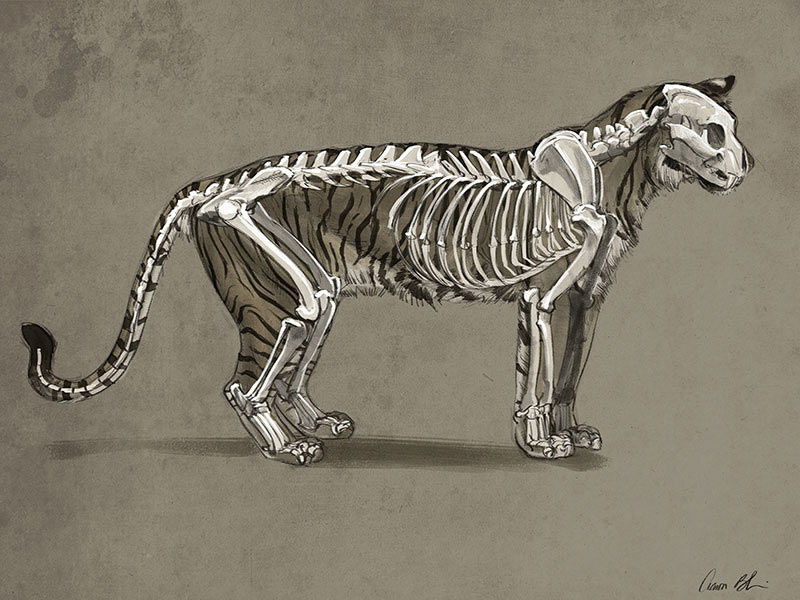

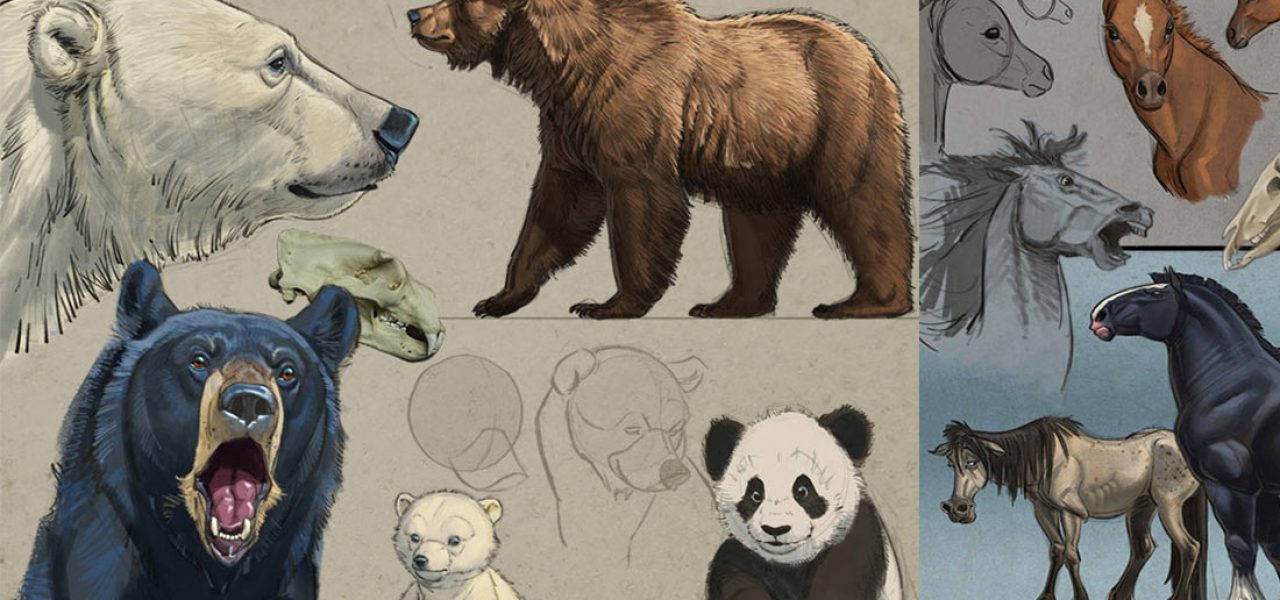
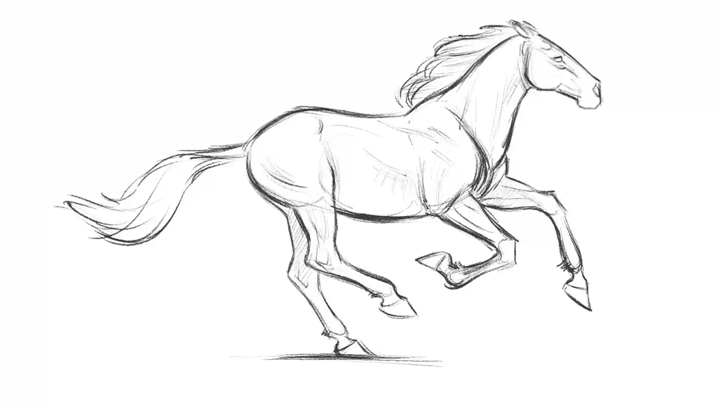
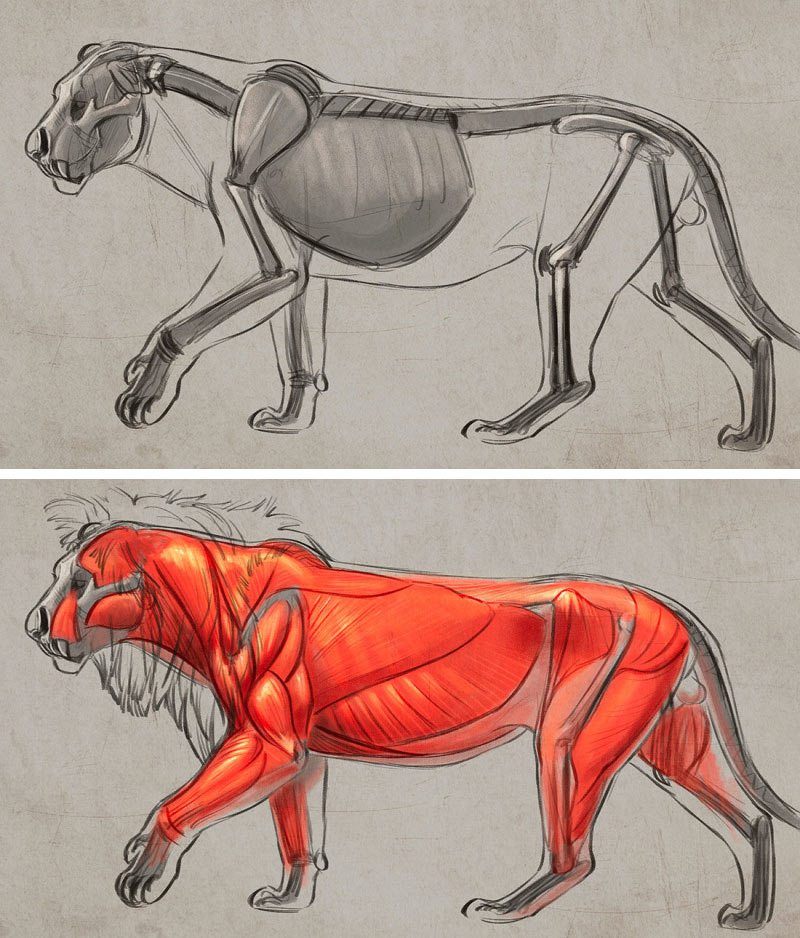
What I mean by that is that if you study the comparative anatomy of animals or even humans you will quickly uncover that we all have basically the same bones and muscles groups. Mammals, birds, reptiles, et al., all have skulls, neck bones, rib cages, pelvises, leg bones, and more. It’s just where they are positioned and how they are proportioned that makes each animal unique.
So here is a tip: You don’t have to memorize the anatomy of every animal! Instead, do what I do and formulate a “generic” animal in your mind. Once you understand that a tiger and a horse both have a skull and a pelvis it’s just a matter of understanding where to place them on the body. The same goes for the major muscles and muscle groups. I promise you that a good understanding of comparative anatomy will be your best friend when it comes to drawing or even animating animals.
BRING THE RIGHT SUPPLIES AND BE PREPARED
I mention this point a little later in the video, but felt it made the most sense in the article here as it’s part of your pre-trip planning. When going out to draw in nature there are things I strongly recommend you bring with you. Obviously, bring all the art supplies you will need: pencils, charcoals, sketchbooks, etc. – I personally also like to bring a small watercolor set with me as I find I can get down quick color studies that well.
But beyond that, think about your “gear” and what you will need on location. Get a good art bag for lugging stuff around. Focus on travelling light and being as portable as possible. Animals move so you will likely be moving as well. I also recommend a portable “camping-style” chair…something that is lightweight and folds up quickly. You will probably be outside so weather will be a factor. Be prepared for rain! Is it cold out? Bring a jacket! Is it hot? Bring sunscreen and sunglasses.
Nothing will ruin your day of drawing faster than not being prepared for the conditions. So take a few extra minutes before you leave and load up the right equipment.
OBSERVE FIRST. DRAW LATER.
One of the worst things you can do is just start drawing right away. Instead… take a few minutes and observe the animal subject and how it behaves in the environment. Pick a good location, get comfortable in your chair and just watch. Study your subject. How do they move? Do they have a favorite spot? How do they interact with their surroundings or other animals?
Before you put pencil or pen to paper take some time and be present with the animal. In the case of domesticated or “people-friendly” animals like the donkey in the video, get them comfortable with your presence. If they are relaxed with your being there, you will get a much better sense of their unique personality. This will inform your drawings and produce a better outcome.

KEEP IT LOOSE AND MAKE QUICK OBSERVATIONS
This advice holds true for almost any type of field-sketching but is especially true with animals. They are going to move around on you and not cooperate at times…so you have to work fast! Your goal is NOT to make “pretty pictures”. Your goal is to capture information and learn. You are adding to your visual library catalog. The best way to do this is to work loosely and quickly. I also recommend working with a big sketch pad or large paper size as this will help you find the correct proportions. It’s perfectly ok to make many “bad” drawings. That is how you eventually make better ones.
Also, don’t “noodle” your images. What I mean by that is don’t get bogged down in minutia. Trying to render every hair of a lion’s mane is not as important as getting the overall proportions and poses of the animal correct.
TIP: Because the animals are going to move there is a technique that I use to take quick “mental snapshots” of them. All you have to do is stare at the animal for few moments and then quickly look away at your sheet of paper. This will leave you with a mental “flash” image on your brain. Try to draw that and hold on to it.

With that mental snapshot in your brain combined with your understanding of comparative anatomy you should be able to get down poses quickly even if the subject keeps moving on you. I do this technique again and again when drawing animals on location. Once you perfect it, you will be drawing animals like a pro.

ADJUST/REVISE YOUR PROPORTIONS AS YOU GO
Often times I don’t get my scale or proportions right in the initial quick pose sketch. When working fast this is not an uncommon issue. So don’t be afraid to revise your proportions and re-draw right over the top of your initial loose sketch. This is a “fact finding” mission after all so making observations and revisions will help you, not hurt you.
Look at your sketch. Compare the head/skull size to the positioning of the neck. Is it accurate? If not, adjust it. Pay special attention to the pelvis area. Are the leg bones connecting to the hips in the right spot? How about the length of the body between the shoulders and the pelvis? Look back at the animal. Even if they have moved on you should still be able to get a sense of their scale. Adjust as needed.
TIP: Try using charcoal! One of the reasons I love to work in charcoal on location is that it’s a very forgiving medium that makes it very easy to wipe away and redraw/adjust. Working this way can save you a lot of time erasing. It will keep you actively making marks and increase the fun you are having.
BONUS TIP: TAKE LOTS OF PICTURES AND BUILD YOUR PERSONAL REFERENCE LIBRARY
This is a little bit of a no-brainer, but is something that people often overlook. You are out there, you’re all set up anyway so be sure to shoot as many pictures and/or videos as you can. As great as Google and other tools are there is nothing like being able to jump into your personal photograph library and see tons of high-res images of animals that you personally shot out in the field. This is something that will be 100% unique to you and your art.
Personally, I’ve set a goal for myself to eventually have all of my art 100% based on my own photography reference. While this isn’t always possible I can tell you from experience that there is a very special feeling you will get when you complete a work of art knowing that 100% of it’s elements were from your own hands.

HAVE FUN & GATHER AS MUCH INFORMATION AS POSSIBLE!
Drawing animals on-location is meant to be fun, not arduous. If you find yourself not having a good time, mix it up. Change your position or viewing angle. Move on to a different subject. Hopefully you’ve packed the right gear for the weather and you are keeping well hydrated. If so, then you should find the hours roll by and that you are filling a sketchbook with lots of images.
More important than the art itself though are the additions you are adding to your mental library. You will struggle at times, but each time you go out it will get a little bit easier. And the knowledge base you are building for yourself will be absolutely priceless.
So get out there and start drawing! Shoot lots of pictures, do a lot of sketches and gather as much knowledge as possible as you can about your subject. Then bring all of that back with you into the studio. In the end it will make you a better artist!
WRAP-UP
Well that’s it. Those are “The Essentials of Animal Drawing” as I see them. I hope that you’ve found this useful and that it helps you with your own artwork. This should get you started, but there is tons more to learn.
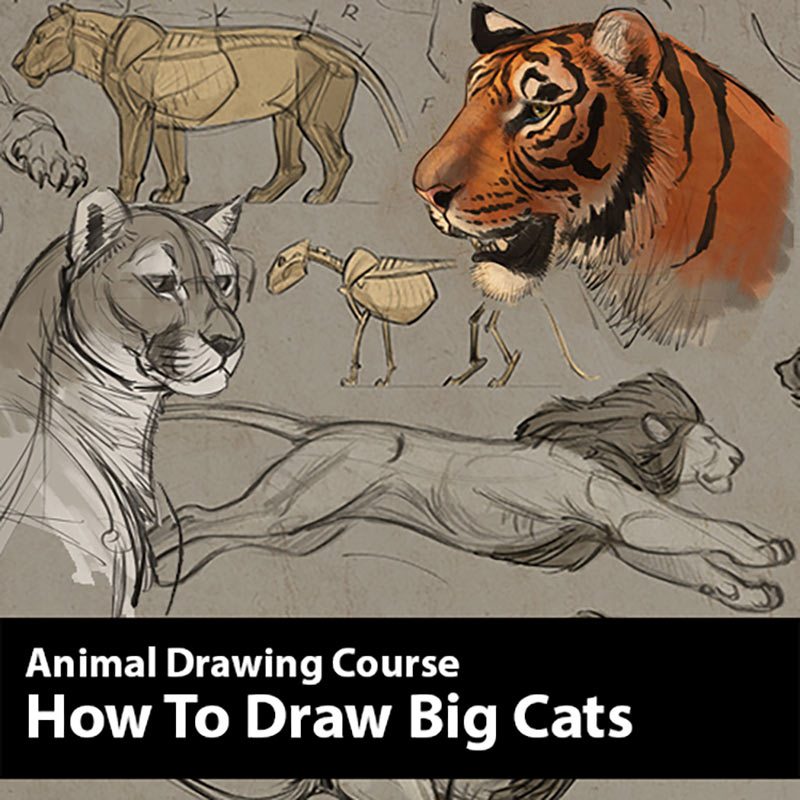
If you are interested in additional animal drawing lessons I have a complete lineup of courses on my website CreatureArtTeacher.com – I’ve got lessons on “How to Draw Big Cats”:

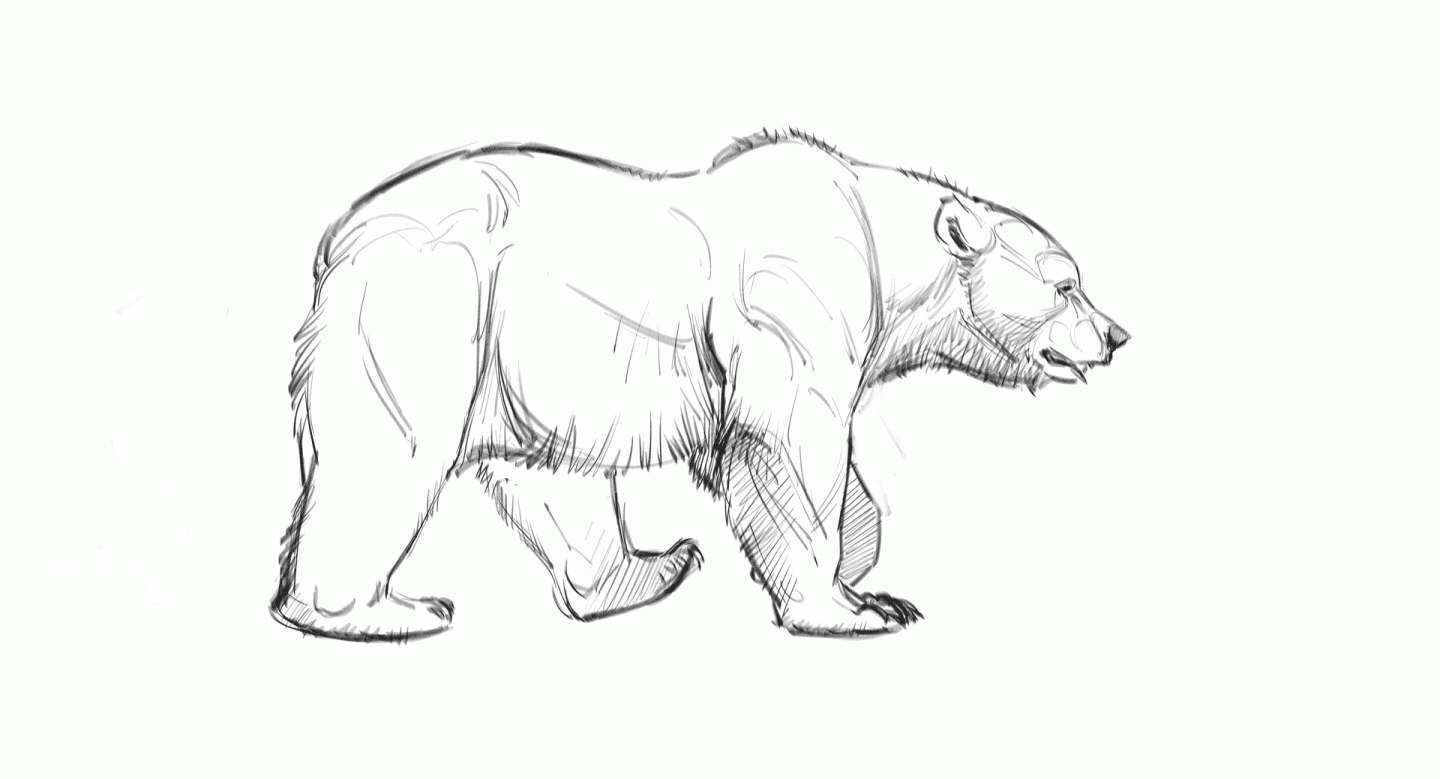
and my newest course “How to Draw Bears”:

There are many, many hours of in-depth content available. I even dive deep into animal locomotion and movement!
Enter promo code “CartoonBrew” and Save 25% OFF any order!
I also offer a variety of free tips & tricks on my Youtube Channel. I hope that this helps you put some beauty out into the world! – Aaron Blaise
PS: Here is a little bonus video I shot on location this same day where I am drawing some turkeys:
About Aaron Blaise
For 21 years Aaron worked with Disney helping to create some of the greatest animated films ever made. During that time he worked as an animator or supervising animator on The Rescuers Down Under, Beauty and the Beast, Aladdin, The Lion King, Pocahontas, Mulan, and more. In 2003 he was co-director of Brother Bear for which he earned an Oscar nomination for Best Animated Feature Film.
After Brother Bear he helped to develop several projects but ultimately left Disney to pursue an opportunity back home in Florida. Aaron recently served as 2D animation supervisor and character designer for the “The Bear and the Hare,” an advertisement loved by millions around the world. He is currently also working on a new animated short film, once again involving bears called Snow Bear.